Where Have I Been and Other Catching Up…

Oof.  It’s been over six moths since my last post.  Yeah, that wasn’t intentional, I swear.

You may have been wondering where I’ve been (although if you follow me on Facebook – and if you don’t, you really should – you probably know).  The short answer is that I’ve been EVERYWHERE.  I’m pulled in about a zillion directions right now.  It’s fantastic, and I’ve never been happier, but it’s definitely left very little time for blogging!

The long answer, of course, is that I had a baby girl in early April.  She was an eagerly-anticipated member of our family, but any new parent will tell you that it’s a big adjustment!  Baby A has grown so much in the last several months; it’s almost impossible for me to imagine that she was ever just 7 lbs!   We used this fantastic photo from Chrystal Cienfuegos Photography for our Christmas photos last year:

Christmas-Photo-2012-small

Before she was born, I had some beautiful maternity pictures taken by Melissa McClure Photography, and did a Baby Wishes video with Murasaki Media.  If you or someone you know is expecting a baby, I highly recommend doing both photos and a video before the baby is born; I am so happy we did!

maternity

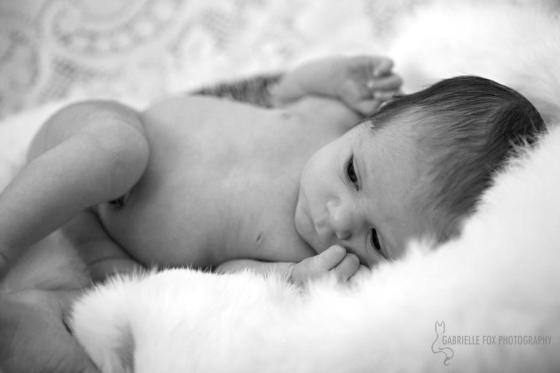
Once she arrived, we had more photos taken, this time by Gabrielle Fox Photography.  She’s so tiny here!!!

baby

Most recently we had photos taken of Baby A by TWO fantastic photographers (it just sort of happened that way!), Sarah Layne Photography and flutter glass PHOTOGRAPHY:

Aurora_6-months_watermarked_11

A

Gah, I can hardly stand the cute!!

She sits up consistently now, is eating some solid foods, and is learning to crawl (exciting and scary at the same time) and teething (awful).  She also wants constant attention!  Baby A is quite the demanding boss, so Mommy hasn’t had much time for blogging.

In the mean time, of course, the first anniversaries came and went for Julianna + Kyle, Soila + Steven, Chris + Emma, Stacy + Tyler, Alexis + Chris, and Ana + Gina!  And next week will be the first anniversary for Cindy + Neal, followed by first anniversaries for Diana + Julian and Richelle + Matthew…  It’s hard to believe that a year has flown by!  Unfortunately I am still missing quite a few photos from the weddings above (something about last Spring, especially, and getting pictures from photographers), but here’s one of my favorites, by the lovely Stacy Alberto Photography (formerly Sunday Romance Photography):

rec4cake-062386wRichelle, this is easily one of the best faces I’ve seen in a wedding photo! 😉

Fun fact; I actually had three weddings scheduled this past spring, two for fellow wedding pros.  I was thrilled to find out last summer that I was pregnant with Baby A, but sad to have to miss out on Alia, Jenna, and Liz’ weddings!

Then, of course, I’ve been working on this year’s weddings.

First, we had Megan + Mike at Condor’s Nest Ranch, with a photo by Faithfully Focused Photography:

m+m

I did all their decor/design, and boy was it gorgeous!  It was recently featured on Rustic Wedding Chic, and I love how the feature shows off all the lovely details we came up with!

Mike+Meghan-524

Then was Damaris and Omar’s wedding at 94th Aero Squadron, with beautiful photography by Jessica Chavez.

i-WDQpwDG-LYou may recognize Damaris and Omar from their styled wedding shoot that I did back in March (yes, at 9 months pregnant) at Presidio Park with Erica of Les Amis Photography.  It was recently featured on Bisou Bride!

2013_17_MAR_ENG_DAMOMA_123

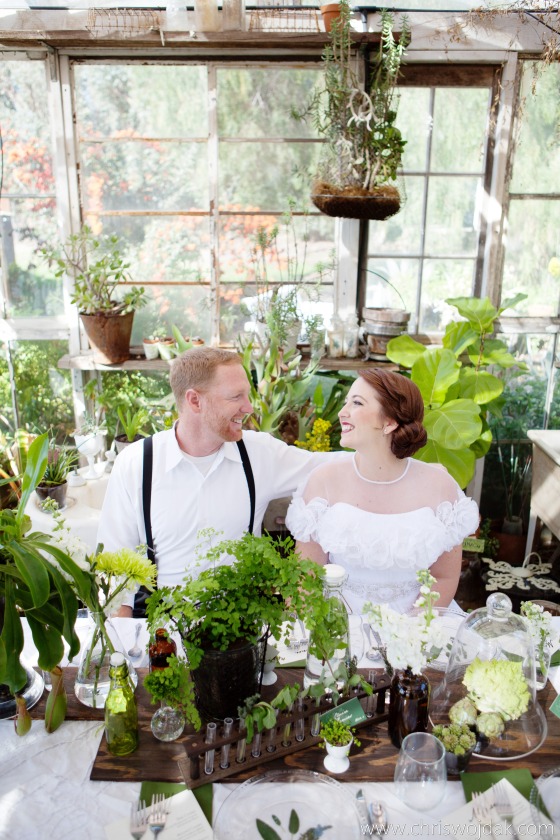
Unfortunately I haven’t gotten photos back from either September wedding I did, but speaking of features, the shoot I did i February with former clients Stacy + Tyler and the ladies at Chris Wojdak Photography, Penny Blooms Floral Design, Unbridled Beauty, and Mili’s Sweets at Condor’s Nest Ranch got a lot of press this summer!  It was featured on Sweet Violet Bride, Things Festive, Trendy Bride, and Storyboard Wedding!

Ludwig_Ludwig_Chris_Wojdak_Photography_IMG2055

Of course I have a busy few months ahead of me; I have two more weddings and a birthday party (or two) left this year.  And next year I’m already quite booked – I don’t have any availability until late April, and even then I’m pretty booked until the Fall!

Oh yes…  And I have not one but two big things in the works.  To be announced soon.  Stay tuned!!! 😉

No, seriously… The Boho Glam Shoot was Featured AGAIN.

I’m flabbergasted.  Seriously.  I feel like Sally Field.  “You like me!  You really like me!!”  It’s hysterical.  This little shoot that Desiree of Penny Blooms Floral Design and I put together in a week…  The one where I dragged my sister in to be our model in the biting January wind (it doesn’t look like it but the poor thing was shivering!)…  The one where I designed the stationery suite in less than a day…  It’s been published again.

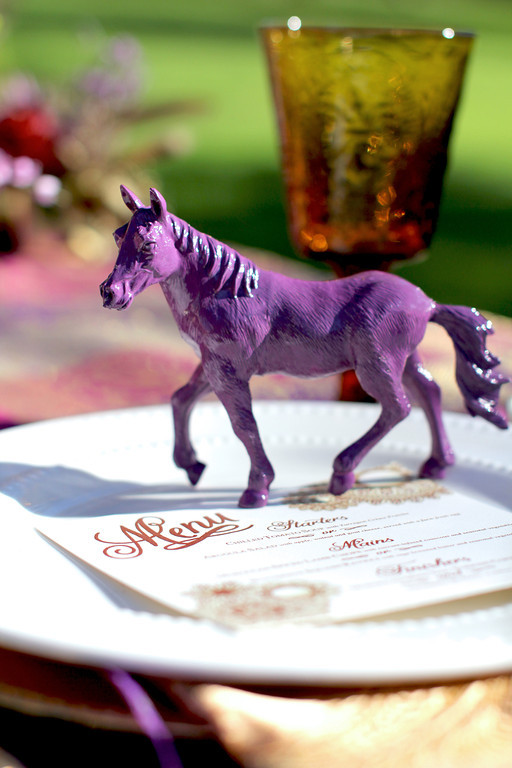
This time on Kiss My Tulle, where owner Cris commented specifically on Desiree’s fantastic purple painted horses (and here I was last year questioning her choice…  Not after I saw them, but I kept thinking before they were finished that they should be gold).  Yup.  They’re still gorgeous.

BOHO-009-XL

Yes, this makes six features for this one shoot.

I think I need to find an appropriate way to celebrate. 🙂  More photoshoots, anyone? 😉

Happy Anniversary Emily + Jeremy!

I can hardly believe it’s time for another anniversary post (one day late)…  It seems like such a short time ago that we were hanging the lanterns in the pool house at The Inn at Rancho Santa Fe!  Emily + Jeremy’s day was chic, whimsical, and romantic, and the photos are to die for!  You might recognize these two as being all over my website, blog, and Facebook page…  I can’t help it – they’re just so gorgeous!

Wishing you two the sweetest of anniversaries and another year of happy marriage! 🙂

See the full gallery of photos from Emily + Jeremy’s wedding on my website!  And read the blogs about their ceremony and reception!

Emily + Jeremy’s Modern Handcrafted Inn at Rancho Santa Fe Wedding Details:

Happy McAwesome First Anniversary Neva + Rob!!!!

These two get around, at least on my blog.  The photos aren’t always the highest quality (since I took them and I’m decidedly not a photographer)  but it hasn’t stopped me.  I love them and always will.

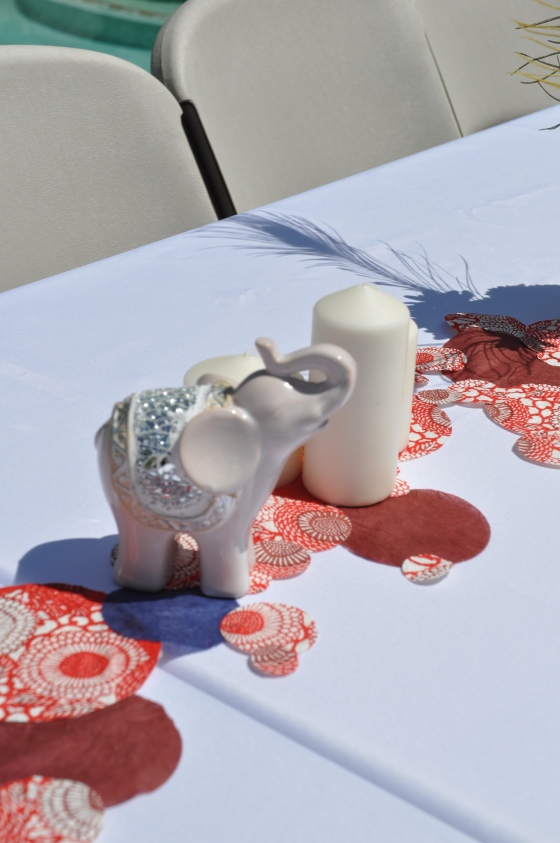
Elephants!

Actually I love this whole wedding.  I’m SO glad I got to be a part of it.

Elephant-topped cupcakes by Courtesan Cupcakes!If there were ever a wedding that was a testament to the statement that you can have a wedding on any budget, this was it.  Spending under $4000 for a fabulous day full of love and personality and celebrating with your 60 closest friends?  Yes please.

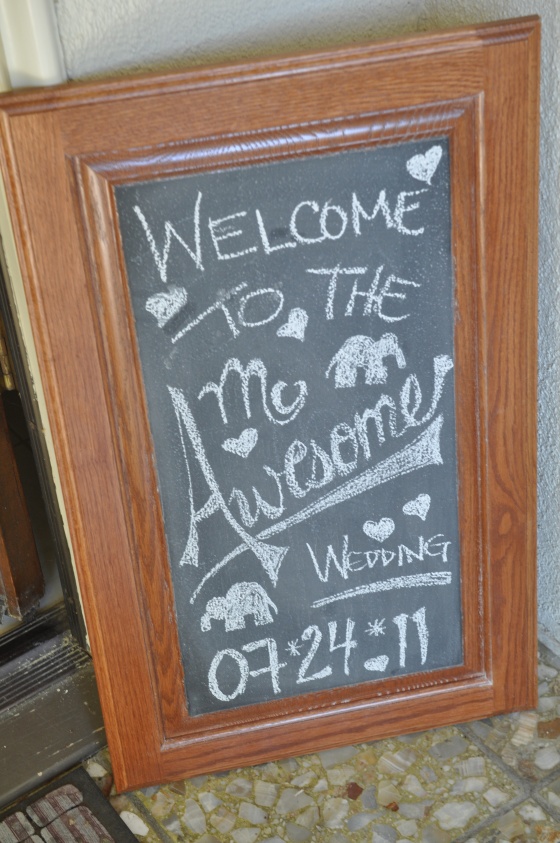
Welcome to the McAwesome Wedding hand drawn sign by Events by Elisa

Of course it helps when you have a couple that is completely laid-back with no real expectations aside from having a good time.  And that particular couple happens to have a lot of talents.  And talented friends.

Cupcake Table by Events by Elisa and Courtesan Cupcakes!Also?  A fun theme rocks it every time.  This is the first time I’ve ever seen a wedding inspired by the movie The Party, but that didn’t stop them.  In fact, they took the basic inspiration and ran with it.  So this is also a great example of not letting the inspiration for a wedding or party limit you.

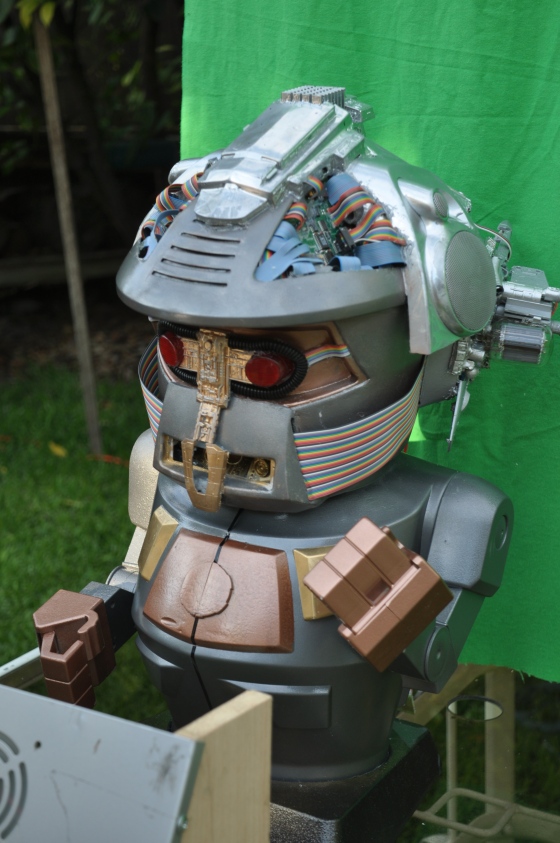
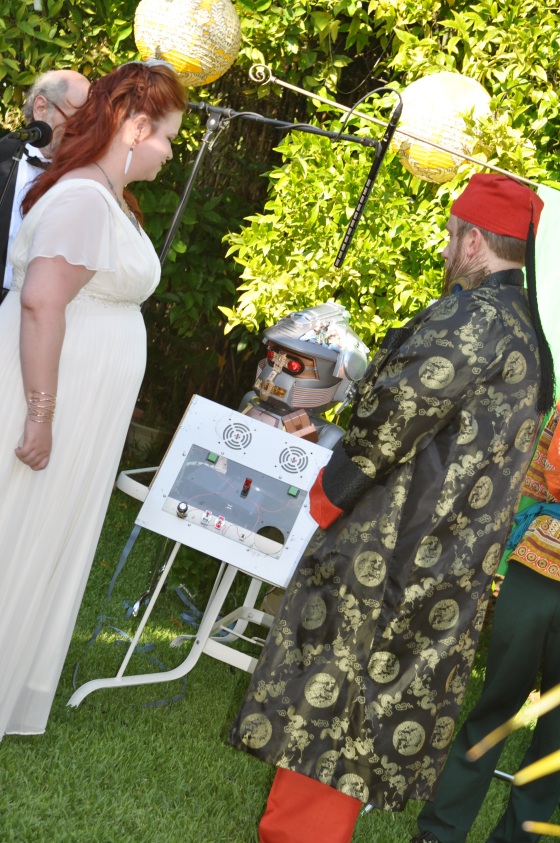
Yes, an elephant in a birdcage!It’s also a great reminder to let your personalities shine.  After all, not many people would get married by a robot.  But these two?  This was the perfect officiant for them.

Father Emiglio, the Robot Officiant!Of course if Father Emiglio is the perfect officiant for you, don’t hesitate to contact the couple.  They’d love to program him to marry you too.  No, really.  They made a video about it.

Married by a Robot. Oh yes.

It’s hard to believe that this wedding took place on the couple’s one year anniversary of knowing each other – and only three months after they got engaged.  Neva + Rob, you two truly are McAwesome and I love you both to bits.

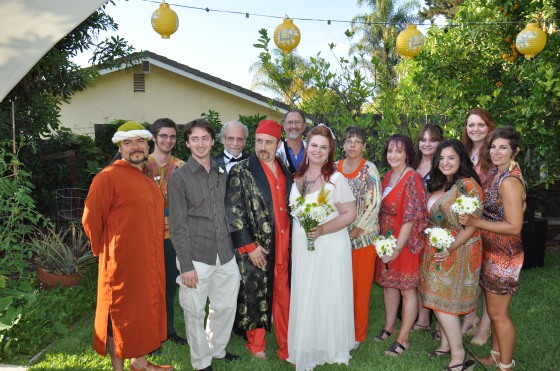
The McAwesomes, shot by Erin of Paw Prints Portraiture

I am so proud to have been a part of your wedding and I’m wishing you the happiest of first anniversaries, with many, many more to come!!!

The bridal party!

Neva + Rob’s McAwesome Backyard Wedding has been featured on RogueBride!  To read Neva’s fabulous review and see more photos of the day, check out my website!

Neva+Rob’s McAwesome Backyard Wedding Inspired by The Party 07*24*2011 Wedding Details:

To DIY or Not to DIY?

DIY (or Do-It-Yourself, if you’ve been living under a rock) details can bring heaps of personality to your event.  The handmade look is “in” – but more than that, there’s a real sense of accomplishment when you look back at an event that just screams that you were the host.  Details you created by hand can take your wedding from blah and everyday to unique, interesting, and personalized.  And – sometimes, if they’re done right – they can save you money.

I am a huge supporter of DIY projects for weddings and events.  But there’s a catch.  If you want to Do It Yourself, you have to Do It Smart.
Handcrafted rice paper centerpiece for the family's round table by Events by Elisa

It’s a natural tendency.  The insistence on being Superwoman (or Superman!), on taking everything on.  We all do it.  But it’s one of my jobs to alleviate stress for my clients, so I will always have the same advice:

Choose wisely, plan ahead, do a trial run, start early, leave plenty of time, work efficiently, embrace imperfections, be realistic about costs, and know when to go to plan B. 

Okay, it’s not poetry.  But trust me on this, it’s advice worth heeding.  Unless you actually like to be stressed out, up working on projects all night right before your wedding or event, of course.

Choose wisely

While you might be painfully aware of every single detail that goes into your wedding or event, your guests only ever see the final product.  They won’t notice if your tablecloths are the perfect shade to compliment the bridesmaids’ dresses.  They won’t judge you for buying premade sweets for your buffet.  They simply won’t care if you’ve hand-embroidered every napkin.

Oh, they’ll see the overall look.  Some of your (more event savvy) guests might even notice a few of the special details.  But as a rule, your guests only notice a fraction of what you put into your wedding or event; so choose your handmade details wisely.

I always ask my clients who are considering making the details themselves what they want most to see at their wedding or event.  When in doubt, go for the visual impact – the big wow.  I also ask whether they have any experience with the DIY project at hand.  After all, baking and decorating a dozen cupcakes can be a challenge for someone who rarely cooks, but baking and decorating twelve dozen is tough even for the most experienced baker.  Likewise any project that you haven’t done before has a 50/50 chance of being harder than it looks (I, for example, am a disaster at making cake pops, no matter how many tutorials I read or watch).

When discussing strategies with my clients for designing their wedding or event, I always suggest to take on only one or two DIY projects; with careful advance planning you can do more, but beware the totally normal tendency to try to do it all.  Taking on too much might mean not getting it all done.

Plan ahead

French chefs are trained to cut first, cook second.  Instead of searching frantically through drawers and cupboards for just the right spice as the dinner is bubbling away on the stove, they measure just the right amount of each ingredient into little nesting bowls, all laid out on their workspace, before turning on the stove.

The trick to a smooth DIY project is to prepare your own mise en place (“putting in place”).  Read the instructions for your project, or figure out your plan of attack if it’s a totally unique idea.  Read them again or sketch out exactly what you need.  If you’ve heard the expression “measure twice, cut once,” that’s exactly what you need to do here.  Especially if a project is brand new to you, the last thing you need is to get halfway through and realize you need to make a run to the store.  Make yourself a shopping list and always get more supplies than you think you’ll need (if I’m making a dozen tissue paper flowers and my instructions say I need ten pieces of tissue paper per flower, I’m picking up 130 or 140 pieces; always better to have too much than too little, in a case like this!).  Lay everything out on a nice stable, permanent surface, and expect to dedicate the surface to your project until it’s completed.  And don’t forget to find a storage place for your finished project, before you start!

Do a trial run

I get a lot of questions from clients asking how long a project should take them to complete.  There’s no short answer to this question, even if I’ve done the project a thousand times before.  For example, it might take me twelve minutes, on average, to fold and fluff a tissue pouf.  But I’ve made dozens of them, so I have the advantage of experience.  I also have ripped dozens of them (it happens), and I know that certain tissue papers will be more cooperative than others.  If I tell you that you should plan on 15 minutes apiece, that might be an excellent estimate.  For me.  But if you have less of an affinity for the project, you’re exhausted from a full day of work, or the tissue paper you’re using is particularly thick or thin, it might take you closer to an hour.  Or you might get so frustrated by the whole thing that it just doesn’t happen at all.

To estimate how long a project will take you, to determine if you like the materials you’re using, and to make sure that you can even complete it at all (cake pops will never again be something I attempt!), you must do a trial.  Get enough of the supplies to make a single trial piece, set a timer when you start, and go slowly to make sure you complete all the steps.

Tissue Poms

Start early

Of course your trial run will help you establish a ballpark figure for how long your DIY project will take.  But a rule of thumb is that something is always going to happen to get in your way of finishing on time.  I always, always, always suggest to my clients to estimate that their project will take twice as long as they think, and to plan accordingly.  And, except for perishables, I strongly encourage them to plan on finishing no less than a week before the wedding or party (the earlier the better).  That way if the family dog gets sick, or the Maid of Honor can’t make it to help, or the store is out of supplies, you won’t be in the weeds.  You’ll just calmly pick up where you left off, a day or two after you’d anticipated, or add a day or two on to your finishing time.

Starting early has another advantage, too.  You can tell before the-wedding-eve if you might have trouble finishing, and call in reinforcements (what’s the wedding party for, anyway?) or move on to the next item.  And it’s an exceptionally satisfying feeling to look around you two weeks before an event and think, “I have no more DIY projects to do – I’m going to the movies!”

Leave plenty of time

This might sound redundant, but it goes hand-in-hand with starting early.  Especially for weddings, the days leading up to the Big One can get hectic.  Family comes into town.  Nails and hair need doing, the dress needs one last fitting, the rehearsal needs rehearsing.  It’s easy to overschedule.

Even for a social event, if you’re working a full-time job (full-time mommy is a job too!), or you have other obligations, it’s easy for time to slip away.  Something I’ve learned to do is carve out large sections of time for projects, but even that can get tough.  Leaving yourself plenty of time, solely dedicated to preparing your DIY projects, scheduled into your week, is the best way to ensure that you’ll be able to get it done.


Work efficiently.

You know how big manufacturing was revolutionized?  The assembly line was invented.  One person did the same thing over and over until all of the pieces for all of the items being manufactured were made.  And only then (if ever) did they start on something else.  The same principle should apply to any DIY projects you might have.  It’s much faster to cut 100 strips of paper to use as belly bands for your invitations than it is to cut each strip individually, as you need it.  And if you think “in bulk,” you’ll be inclined to think of things like minimizing the number of sheets you can cut at once while still maintaining quality, or how best to make the minimum number of cuts (I once received a “finished” piece from a designer that required four cuts per strip of paper, with little tiny stripes of white between each strip…  I almost threw my paper cutter across the room!).  You can use this principle to make backdrops or table runners, embellish details, and assemble just about anything solo.

But working efficiently can mean recruiting help, too.  After all, what makes a project go faster than spreading around the workload?  My favorite method for assembling boxed candy favors is to create an assembly line where one person folds boxes, another places paper shavings inside, a third adds one type of candy, a fourth another, a fifth closes each box securely, and a sixth ties a pretty bow or adds the sticker on the outside.  Yes, it gets repetitive.  But it ensures that everything is done consistently, quickly, and with minimum fuss.  And it’s a heck of a lot more fun than putting everything together by yourself.  This goes the same for assembling Out of Town bags, invitations, and a multitude of other repetitive tasks.  It’s also a great way to involve people who might not be as artistically inclined – they can make precise cuts, count out exactly the number of candies that go in a box, or stick adhesive to an invitation, and still make a big contribution to your wedding or event, without you having to redo their work.  That said, working efficiently means not redoing work – so if you worry that one of your loved ones might not be able to handle the task at hand, don’t assign it to them!

photo by Stephina Photography

Embrace imperfections.

Handcrafted events are just that.  Made by hand.  Unless you’re secretly Martha Stewart (and if you were, you’d tell me, wouldn’t you?), your DIY projects probably won’t look like they belong in a magazine.  Especially the first time you make one.

But that’s okay.

In fact, it’s better than okay.  It’s excellent.

You made this piece.  With your own hands.  How often can we really say that, in today’s grab-and-go world?

I think one of my favorite reasons to DIY is to just get my hands dirty.  To feel the paint and the clay and the wood and the paper.  It brings me joy.  And it should bring you joy too.  Remember art class in Kindergarten?  Your project didn’t have to look perfect.  It was perfect because you made it.

The same thing goes for your DIY projects.  Unless you’ve been sewing, or painting letters on a sign, or making tissue paper poufs, since the age of three, you probably will need a lot of practice to just make something that doesn’t look like a mess.  And even if it does…  Who cares?  You made it.  Be proud of it.  That’s the charm of “handmade” after all.

Be realistic about costs.

One of the biggest misconceptions people have about DIY projects is that they’re always less expensive than buying ready-made pieces, or hiring someone to make a piece for you.

I’d like to tell you that it’s true.  But it’s not.

Between buying equipment (staple gun, paintbrushes, drill, paper cutter, sandpaper, etc.) and supplies (paper, wood, paint, ribbon, etc.), a simple-looking project can turn into a money pit.  Many artisans can actually make a handcrafted project for you for less money (and in less time) than you could, because they already own the equipment, buy supplies in bulk, and know how to do the projects to ensure that they don’t waste anything.

This isn’t to say that you can’t create an inexpensive DIY piece.  But if budget is really an issue, it pays to be extremely aware of the costs of all of your equipment and supplies before purchasing anything.  Don’t forget to factor in extra supplies for your trial/learning.

Sweet Table Tags by Events by Elisa

Know when to go to Plan B.

Including beautiful handmade projects is a fantastic way to personalize your wedding.  But not every project is for every person, even if you’re crafty.  I learned this the hard way when I was making pipe cleaner Mickey Mouse ears for a friend’s Disneyland bachelorette party last year.  I can whip out a tissue paper pom in no time, but twisting a simple pipe cleaner around a cup to make an attractive ear shape, and hot glueing it to a headband, was impossible.

I ended up making a lumpy, gluey mess.

Luckily my sister was on her way over and just happened to be a pipe cleaner Mickey Mouse ear prodigy (who knew?).  The project that I’d been struggling with for an hour to make a single, awful-looking piece was done in forty five minutes.  And she made twelve.

I share this story to demonstrate that no matter how crafty you might be, you might not be able to make your preferred project, no matter how hard you try.  And in the event that you don’t have a crafty backup person whose strength just happens to be in the area of your weakness, you might have to come up with a backup plan.

Repeat this with me: It’s okay to use my backup plan.

If you’re struggling, slogging through hours of DIY without getting good results, getting angry at yourself and your supplies, or completely unhappy with your finished pieces, don’t forget it’s okay to stop.  Set yourself a time limit or a specific date (at least a week prior to your wedding day) by which you must finish all your projects, so that you’re not still trying to furiously work on DIY projects at 3 am on the day of your wedding.  Trust me on this one: it’s better to substitute your original plan with something more doable (buying or renting napkins instead of hand-embroidering them, hiring a graphic designer instead of creating your own invitations, or buying decorations instead of making them, for example) than to stress yourself out over finishing it.

I promise.

So if you do decide that you want to Do It Yourself, keep in mind the simple rules I laid out above.  Choose wisely, plan ahead, do a trial run, start early, leave plenty of time, work efficiently, embrace imperfections, be realistic about costs, and know when to go to plan B.  And don’t be afraid to ask for help, from a more experienced friend or family member, an online advice forum, or your wedding planner (who has probably already done this sort of thing!).

Oh, yes, and have fun! 🙂

Happy crafting!

Photography credits:
Emily + Jeremy’s Modern Handcrafted Wedding at the Inn at Rancho Santa Fe, 11*05*2011 (Part 2)

When last I posted, I gave you the ceremony portion from Emily + Jeremy’s gorgeous wedding in Rancho Santa Fe last November.  Today I’m sharing the reception with you!

But first…  One more photo of the couple, in a quiet moment between the ceremony and the reception. I love the relaxed, ecstatic expressions on their faces!

For starters, here are some shots of the setup, featuring table runners by Classy Covers and florals by Suzan M Florals.

I’m a huge fan of rectangular tables at weddings.  I’m not really sure why.  I just like them.  Feasting tables too.  I also love mix-and-matching table shapes/sizes so that each one is a little different.  Emily did just that, mixing circles with rectangles and creating an extra-extra long head table!  Being flexible with table shapes and sizes helps accommodate guests with different sized groups.

Remember how I said this dessert table was one of my favorites?  Here’s a shot of the whole thing, including the “Sweet Love” banner Emily made!

And more pictures of my mini bunting.  🙂  Each piece was less than an inch high.

YUM.  My mouth is watering!

My assistant Rachael makes the most gorgeously perfect escort card setups.

We also added some fun touches from the Events by Elisa inventory, including this gorgeous card cage:

And our guestbook tree.  Complete with one of my favorite pieces, the little metal bird.

I love these photos of Emily and Jeremy’s first dance:

And their “cake cutting” (really clinking together cake pops):

And let’s not forget the garter!

Of course I said before that the Chinese lanterns were some of the biggest parts of the decor at this wedding.  I do love a good lanternfest.  Here’s the archway near the dance floor – this is where we used up the extra few that we had.  It just made the whole thing festive, and was a nice surprise for the bride!

And my Chinese lantern sculpture.  Seriously, this took three people FOUR hours working together (perched on ladders!) just to put it together.  But it turned out so amazingly.  I could have stared at it all night.

It looks relatively small in that big photo, but it really made a huge impact on the entrance to the reception.  And that GIANT lantern?  Fabulous.  Especially after dark.

The guests were such fun, too.  Not all weddings end up having a breakdancing party on the middle of the dance floor!  Of course YES Productions kept the tunes coming.  🙂

My assistant Rachael and I got a chance to have a quick photo with the bride and groom. 🙂

It was such a stunningly beautiful, fun wedding, with such an incredible team!!!  I just have to leave you with another of my favorite photos from the day.  🙂

Emily + Jeremy’s Modern Handcrafted Inn at Rancho Santa Fe Wedding Details:

Emily + Jeremy’s Modern Handcrafted Wedding at the Inn at Rancho Santa Fe, 11*05*2011 (Part 1)

Now that I’ve finished up my website (finally!) I can get back to blogging!  And I’ve got quite the backlog of gorgeousness to show you!

I’m starting off with a wedding that probably looks pretty familiar to you, if you’ve visited my Facebook page, or my new website, recently. It’s Emily and Jeremy!  Just a word of warning: this post is EXTREMELY picture-heavy.  I couldn’t pare it down to just a handful.  There is just so much to show you!  And because I didn’t want to explode your computer…  I decided I had to split it into two posts.  🙂

Their beautiful wedding took place on a perfect day in November; the sun was shining but it was just overcast enough not to create shadows in their photos!  And considering that the day before their wedding, it was pouring down buckets of rain, we were all pretty excited to see it looking so fantastic!  It was a bit cool, but that just encouraged everyone to get on the dance floor and boogie!!!

Emily approached me last June, wanting the service that I now call Design+.  She is a graphic designer herself, but wanted another eye to help keep her wedding vision on track.  I loved her ideas from the start, of course, and we had an excellent time shopping together for lanterns to decorate the entry way to the reception (I’ll get to that in a minute)!

It’s obvious when you see the two of them together how much love Emily and Jeremy have for each other.  There was so much joy in the air!  And SO many gorgeous photos.  Emily had assembled a fantastic team of vendors, from Chaz Cruz Photography to YES Productions and Suzan M Florals to Tailored Sweets…  Really every part of the day was more fabulous than the next.

The couple decided that they didn’t want a traditional wedding cake, and opted instead for a dessert display by Tailored Sweets.  Sarah and my assistant Rachael and I styled the table together, and I have to say it’s one of my favorites so far.

Of course, it might have something to do with the super sweet mini bunting I hand made for the occasion.

Or perhaps the tissue pouf/lantern display we created to hang above it (this photo was taken by Chaz as well; I just realized that his logo isn’t on it!).

Those weren’t the only lanterns we used either.  In fact, when Emily and I went shopping, we purchased 35 white lanterns in sizes from 6 inches to four feet wide.  Yes, four FEET.  Add that number to the lanterns I already owned…  And we had a party!

In fact, we used most of those 35 lanterns in the pool house, which served as the entry way into the reception.  Since it was a jarring orange red (not exactly within the color palate of purple and pink!), Emily wanted something beautiful to draw the eye.  My assistants and I worked for almost three hours to hang each lantern perfectly and I am SO pleased with the results.  Our 35 lanterns turned into a single lantern sculpture.  It looked truly stunning, especially as it got dark and the light (just above the largest lantern) lit the entire piece.

But I guess I’m getting ahead of myself again (I tend to do that with details I adore!).  So I should start over.  From the beginning this time.  First, the dress and shoes.

And our beautiful bride.

And her flowers by Suzan M Florals.  Wowza!

First looks are one of my favorite things about today’s weddings – I wish I’d thought of doing one when I got married in 2008, but they just weren’t as common!  This one is simply adorable.

Look at how happy they are!

Bridal Party photos.  Love them!

And then there’s the wedding ceremony.  LOOK at that backdrop (hanging orchids by Suzan M Florals!).  I officially am in love with ceremonies under trees.

It was officiated by a friend of the bride and groom.  One of my favorite parts of it was the wine box.  The bride and groom sealed three bottles of wine into the custom-made box, each one to be drunk on an upcoming anniversary (1 year, 5 years, and 10 years) along with love letters to be read on each of those years.  Feel free to “awwwww!”  I did.

I can’t handle this level of cuteness.

Because of where I stand during wedding ceremonies (I direct people to walk up the aisle and then am at the back), I don’t usually get to see expressions on either the bride’s face or the groom’s.  I love seeing photos like this!

Stunning!

Sealing up the box!

MARRIED!

And of course this next photo will be super recognizable, since I’m totally enamored of the moment.  The bubbles!  The expressions!  The framing!  Chaz, you did an amaaaaaazing job on this one.

With that expression of ultimate joy, I’ll leave you until next week, when I’ll post Part 2 of this beautiful wedding!!!

Emily + Jeremy’s Modern Handcrafted Inn at Rancho Santa Fe Wedding Details:

Under The Sea Baby Shower 11*12*2011

I created this “Under the Sea” baby shower theme for a very special momma – my cousin Natalie!  She wanted a big affair – 70 people, including kids and men – so it had to be anything but ordinary!

Wishing Tree

This shower was originally scheduled – and styled – for outdoors in a pretty, terraced backyard.  But a week before the shower was to take place, we found out that our Southern California sun wasn’t going to behave.  Instead of having a beautiful relaxing sun-soaked November day, we’d have soaking of a different sort.  Rain.  Buckets of rain.

I can’t lie – it was a bit of a shocker, since no one counted on rain during what was supposed to be a very dry November in San Diego.  What was worse was that the home where we’d planned to hold the shower couldn’t accommodate 70 people indoors.  So, thanks to a very generous coworker, we moved on to Plan B: the gourmet kitchen and bar areas of a private clubhouse (the rest of which was already rented out that day for a bridal shower!).

Luckily it was an absolutely gorgeous venue, and luckily even the rain didn’t keep away the throngs of guests.  We showered this Mama in style!

We created some really fun touches, from GORGEOUS sea urchin vases custom made by the insanely creative Desiree of Penny Blooms to cascading bubble chandeliers made from clear glass ornaments provided by the mom-to-be to a wishing tree made from driftwood.

Sea urchin vases by Penny Blooms!

Sea Urchin vases custom made by Penny Blooms

Bubble Chandelier

Driftwood Wishing Tree

Driftwood Wishing Tree

Driftwood Wishing Tree

Natalie and Tony decided that they didn’t want to know the gender of their unborn baby, so we threw a completely gender-neutral party (complete with coloring pages asking if the kids in attendance thought the baby was a Stella – girl – or Brayden – boy, and a single game asking adults in attendance to fill in their guesses for birth stats and gender).  I have to admit, it was kind of tough staying firmly in the “cute and gender neutral” category, but it was helpful that Natalie chose such an adorable “Under the Sea” theme, inspired by a set of scrapbooking stickers she found when she found out she was first pregnant!

I created a set of printed pieces including an invitation featuring original artwork (inspired by the stickers) an original poem by Practically Perfect Poetry, Prose, and Proofreading – I just love how much personality there was in that sweet little turtle!

Invitation featuring original artwork by Events by Elisa and and original poetry by Practically Perfect Poetry, Prose, and Proofreading

Food tags by Events by Elisa

Sweet Table Tags by Events by Elisa

Custom Thank You cards by Events by Elisa

Then of course there was my personal favorite feature of the party – a huge ocean-themed sweets buffet featuring a gorgeous “wave” backdrop of fabric that my amazing assistant found at Joann’s Fabric, hand-assembled clamshell cookies (made by me!), a sculpted sandcastle cake by Hey There, Cupcake!, and the most adorable sea creature cake pops by Calculated Whisk!  The “sand” was actually brown sugar, and the rocks and shells were candy – and every kid there (and some of the adults) loved that they could eat every bit they wanted!  Plus brown sugar was inexpensive, non-toxic, and looked and smelled amazing!

Sweet Table by Events by Elisa, featuring Hey There, Cupcake and Calculated Whisk

Clamshell cookies, assembled by Events by Elisa

Sweet Table by Events by Elisa, with brown sugar "sand"

Gummy fish and Godiva Gems on the Under the Sea Sweets Table created by Events by Elisa

Turtle cake pops by Calculated Whisk!

Gorgeous sand castle cake by Hey There, Cupcake!

A sand castle made of cake, by Hey There, Cupcake!

I can’t help but throw in one extra shot of those cookies…  I just love them so much!

One more shot of

And of course I’m happy to report that Natalie gave birth to Baby Boy Brayden last month and he’s beautiful!

Natalie’s Under the Sea Baby Shower 11*12*2011 Party Details:

Miss Maya’s Dia de Los Muertos Birthday Fiesta!

Last October, I got a phone call from my friend Jacquelyn, asking for help planning her daughter Maya’s first birthday party.  She wanted something really special and unique – a Dia de Los Muertos celebration!

Maya came into this world six weeks early.  It’s my theory that she was just way too excited to finally meet her parents and couldn’t stand waiting any longer to do so.  I mean, with incredibly awesome parents like these, I don’t know if I’d have waited around either!

It was, understandably, scary for Maya’s family and everyone who loved them, back in November of 2010.  But now, it was time for a fiesta – a celebration of life honoring this beautiful big-eyed rosy-cheeked smarty pants!

She looks a little worried here, but I think she just wanted to get back to the party!

Jacquelyn sent me artwork she liked (purchased off Veer) and I laid out an invitation fit for a fiesta, along with food tags for the dinner and cupcakes!

Invitation lay out by Events by Elisa, featuring artwork from Veer.com


I created these gorgeous giant tissue paper marigolds with the help of my incredible assistant Rachael, and Maya’s mom loved them so much that she kept them to hang from Maya’s bedroom ceiling!  Of course I couldn’t have hung them without the help of my “other” assistant, my amazing husband Ryan!  If you like them, you can buy a custom set in my Etsy shop, here!

Tissue flowers by Events by Elisa, available in Elisa's Etsy Shop

Tissue flowers by Events by Elisa, available in Elisa's Etsy Shop

Tissue flowers by Events by Elisa, available in Elisa's Etsy Shop

Something I try to do whenever I’m shopping for a social event is to look everywhere, all the time.  Whenever I’m out and about, shopping for groceries or office supplies or the like, I have a constant list of things I’d like to find in the back of my mind.  I usually find the best – and best value – decorations for social events and inspiration shoots this way!  This party was no exception – I found the lollipops on clearance at Target and the fabulous fabric used for the table runners on sale at Joann’s fabric.  Actually, I should say that my assistant Rachael and my sister Jessica (who were shopping with me) found the fabric.  I just decided we had to have it, and I was right!

It pays to have social event decor on the brain!  I looooove this table runner!

Of course this amazing cupcake display would not nearly have been as beautiful without the artistry of Stevi from Hey There, Cupcake!, who created all the cupcakes you see, as well as the sugar skull smash cake in the center (yes, that’s a cake!!!!).

Cupcakes by Hey There, Cupcake, with custom tags created by Events by Elisa from artwork purchased at Veer.com

Yes, this is a cake, by Hey There, Cupcake!

Maya had never eaten sugar before, so she wasn’t quite sure what to do with her cake, but everyone else enjoyed these gorgeous treats!  She also loved opening her presents –  so she could play with the tissue paper and bags! 🙂

Her mommy thought of every detail – down to the bib she wore for her cake smash.  🙂  This family photo makes me so happy too – aren’t they beautiful?

Maya's adorable Dia De Los Muertos bib, and her family!

Thank you Jacquelyn, Dave, and Maya for letting me be a part of your fiesta!!!  I loved helping to make your day memorable and beautiful!!!!

Maya’s Dia de Los Muertos First Birthday Fiesta 11*13*2012 Details:

McAwesome Table Runner DIY Featured on Rogue Bride!

A couple of weeks back, I posted the McAwesome wedding here on my blog.  Within an hour, I got an e-mail with this subject line: “Holy Sweet Mother of God Elisa – McAwesome wedding is !@@##$$%”.

It was one of the favorite people I have met through the process of planning weddings this year, Lauren of Rogue Bride!  She continued:

I feel like I downed two pots of coffee I’m so excited about the
McAwesome wedding. Oh My God. Can I borrow or buy like all of it?
Especially the elephants and moroccan lanterns. Serious here. Are they
selling? You are amazing! And those paper runners are inspired.

They’re probably submitting that wedding somewhere amazing (Offbeat
Bride? Broke-Ass Bride? Wedding Nouveau? Rockn’Roll Bride?), but would
you do a DIY tutorial for Rogue Bride on those runners?

Just wow.

Now, how could I possibly refuse such a request? 😉

Actually I’m honored to be a guest blogger today, featured on her renegade wedding planning site!  And the title she gave my post makes me blush. 🙂  Love you lots my friend – and thank you so much!!!